
My bread journey began a long long time ago. You might say I didn’t have a choice. I come from a long line of amazing bakers and cooks. We were farm/ranch folk living in the middle of nowhere so you had to make your own food and be creative with the ingredients you have on hand, but there are always certain staples you keep on hand. Growing up we always made yeast breads because the dough was easier to control and the process required less time.
As a kid I watched my mom, grandmother, aunts and sisters make bread and it was natural that the time came for me to pick up the proverbial baton and carry the tradition on. My family usually just made dinner rolls. Sandwich bread was not in our repertoire. My friend Kate’s mom made bread and I loved it. I was determined to learn how when I had time.
Well when Cam and I first married (almost 27 years ago now) I embarked on that project. My first project was to find a sandwich bread that was soft and delicious for bread or whatever we wanted. I borrowed a cookbook from a coworker’s wife who was talented at all things in the kitchen. So Sandy Billings loaned me her bread book and I found the recipe I use to this day for yeast bread. I wish I could remember the name and author because it was a very thorough book that included pictures of each step including how to shape the loaf. I have made ingredient swaps such as coconut oil instead of shortening and honey instead of sugar. The most important part of making bread is practice and maybe even taking notes of factors you change slightly each time.
There is a short list of ingredients and all of them are important in the development of the dough. Don’t skimp on the honey because it feeds the yeast and the salt helps the gluten develop and that helps the texture of the dough. Salt also adds flavor. I have accidentally forgotten the salt before and the flavor was flat while the texture was all wrong.
Homemade Yeast Bread Recipe (makes 2 loaves)
Cook Times
- Prep Time: 20 minutes
- Rise Time: 75–105 minutes (combined)
- Bake Time: 25–30 minutes
- Total Time: 2 hours
Ingredients
- 2 packages Yeast (4 ½ teaspoons)
- ½ cup warm water (around 108°F)
- 1 ¾ cups warm water
- 3 tablespoons Honey
- 2 tablespoons Coconut Oil
- 1 tablespoon Salt
- 6-7 cups All-Purpose or Whole Wheat Flour
Instructions
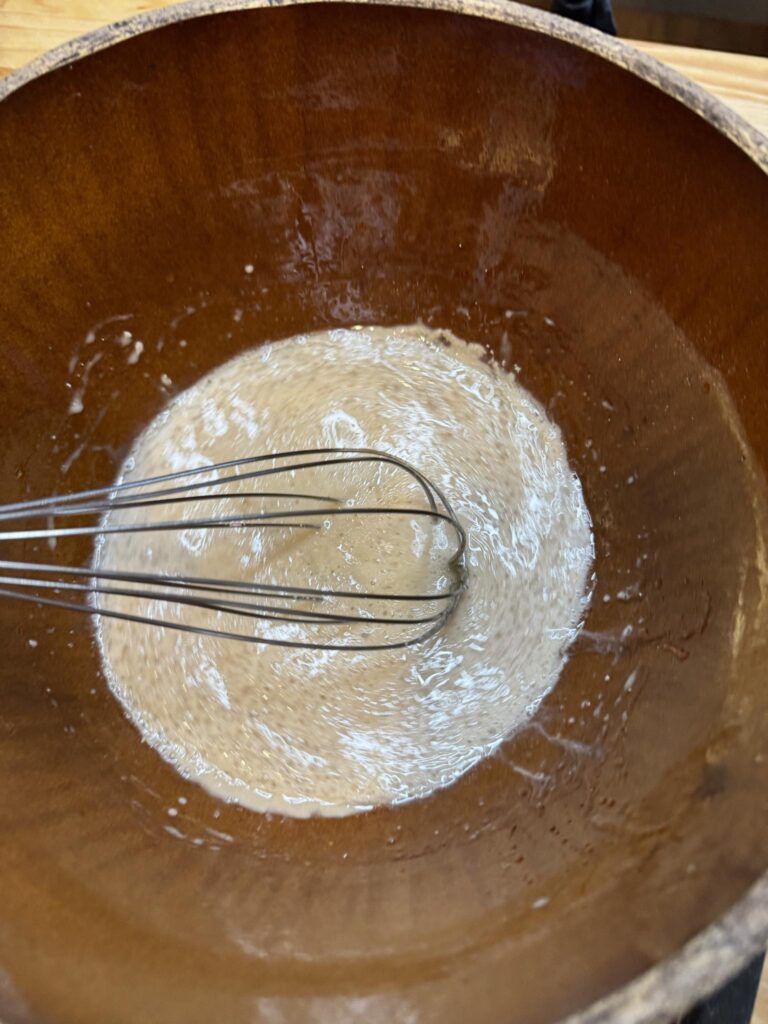
1. Prepare the Yeast
- In a large bowl, combine yeast and ½ cup of warm water. Let it sit for 5 minutes until it becomes foamy.
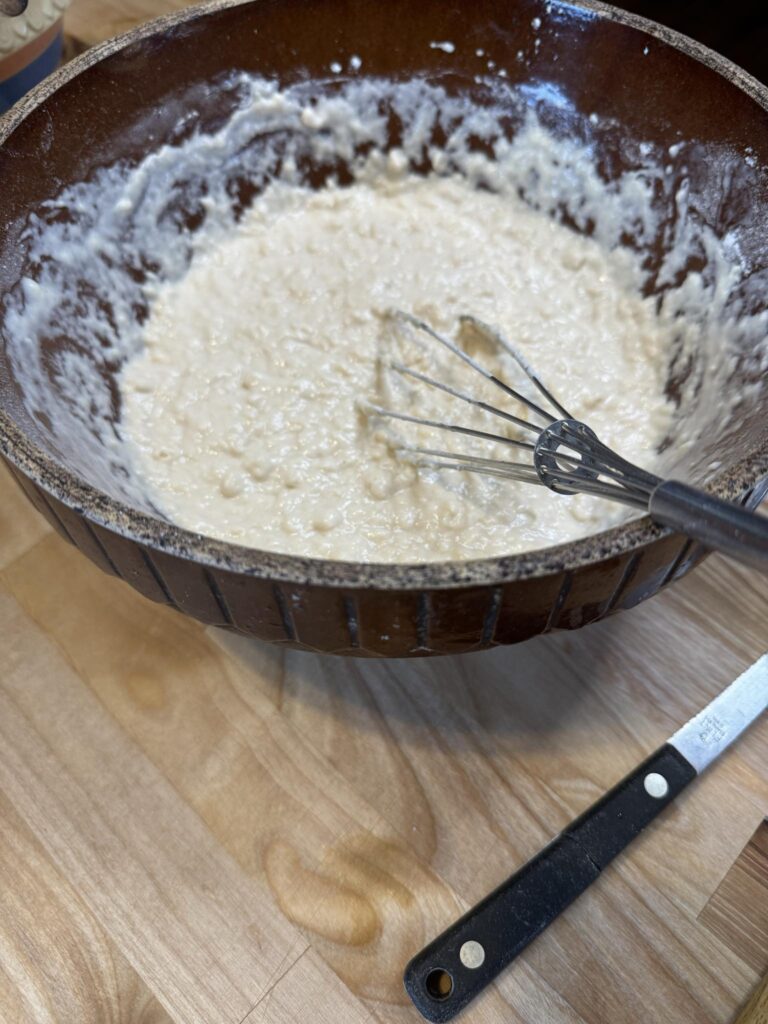
2. Mix the Dough
- Add the honey, coconut oil, salt, 1 ¾ cups warm water, and 3 cups of flour to the yeast mixture. Whisk until smooth.
- Gradually add the remaining flour, ½ cup at a time, stirring with a spoon after each addition.
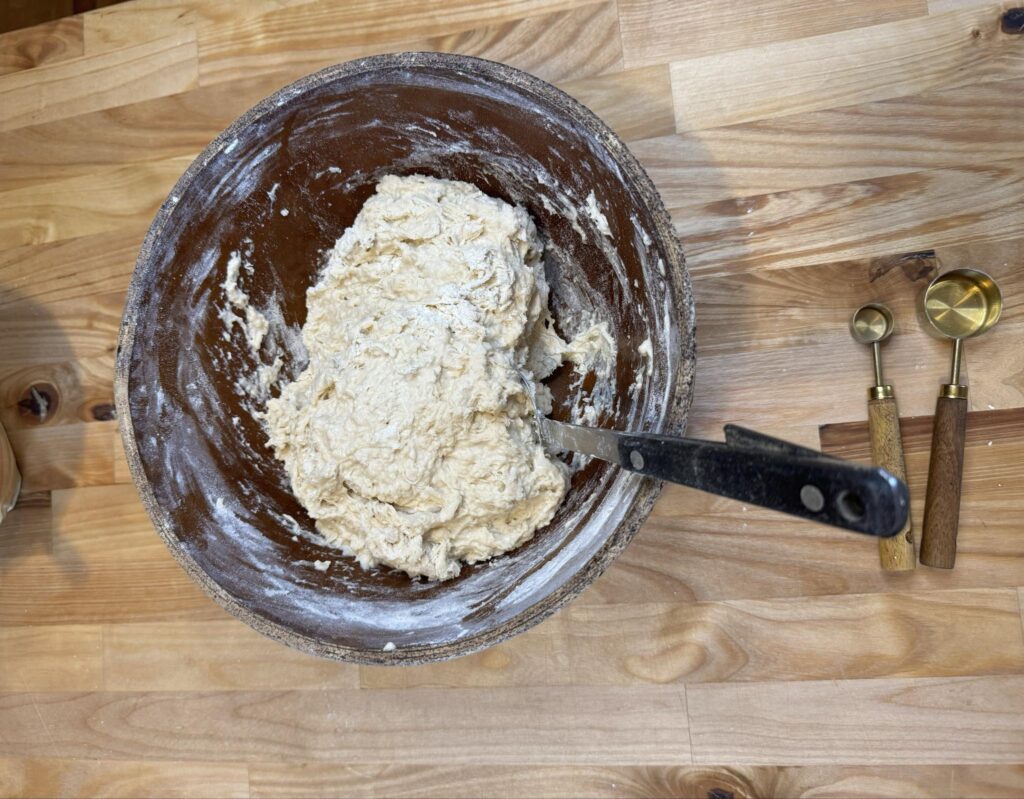
3. Knead the Dough
- Once you’ve added about 6 cups of flour, begin kneading the dough on a floured surface. Add small amounts of flour as needed to prevent sticking. Knead for 5–10 minutes, until the dough feels elastic and smooth.
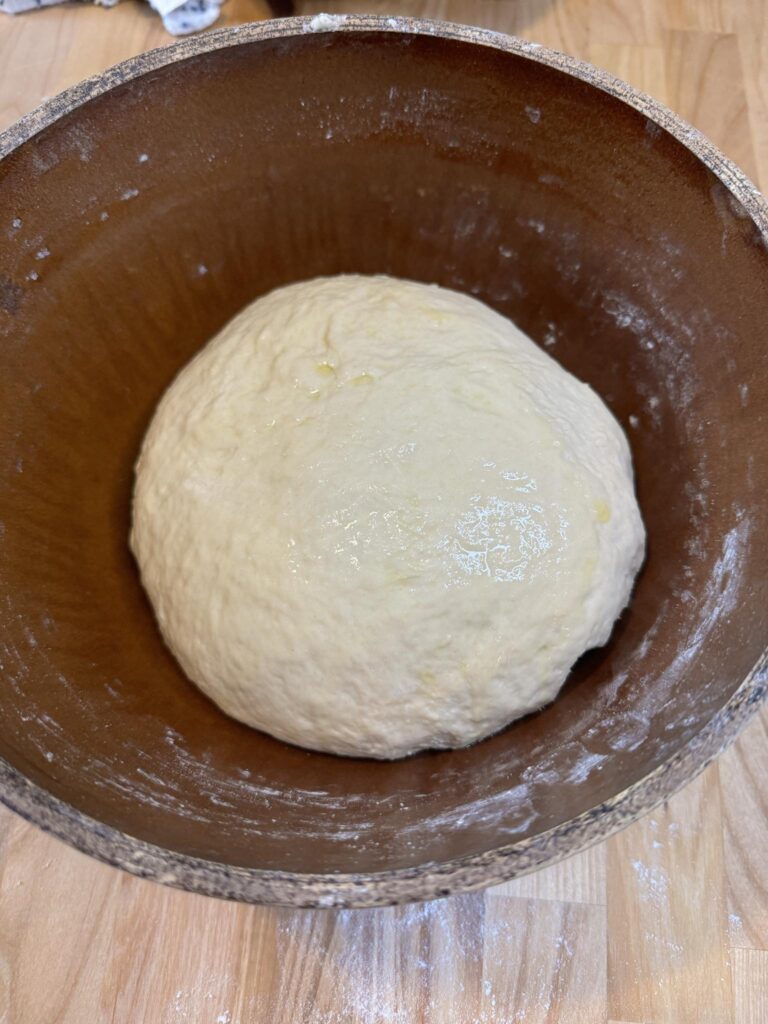
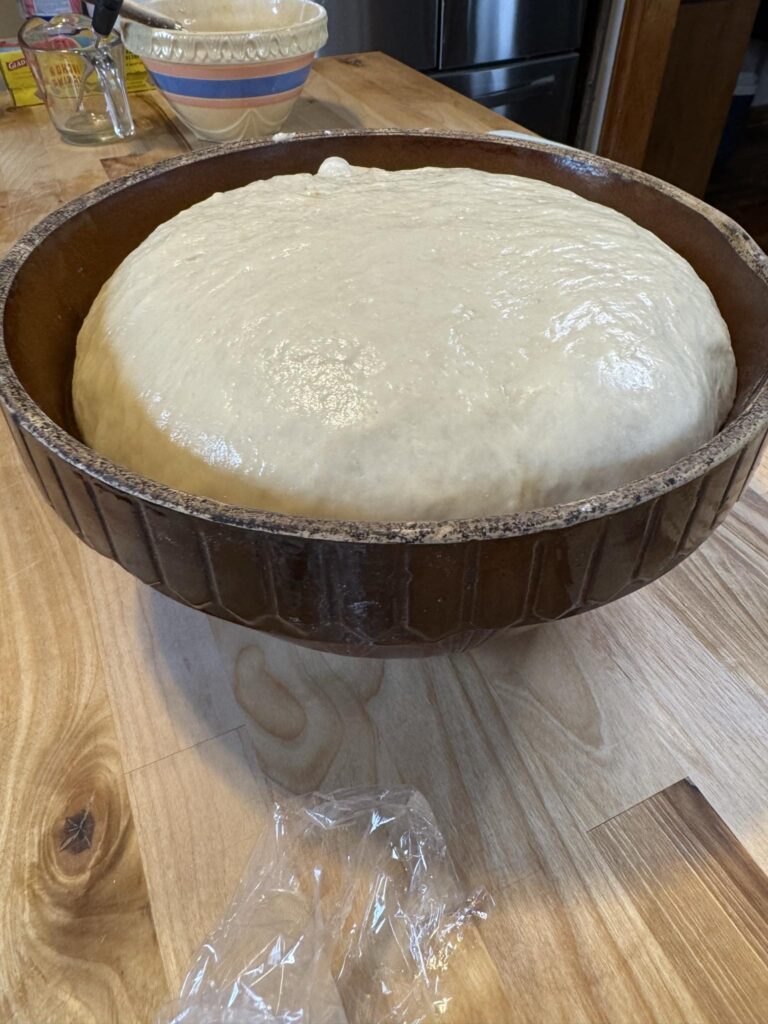
4. First Rise
- Lightly coat a large bowl with olive oil and place the dough inside. Cover with a clean towel or plastic wrap and let it rise in a warm spot for 45–60 minutes, or until doubled in size.
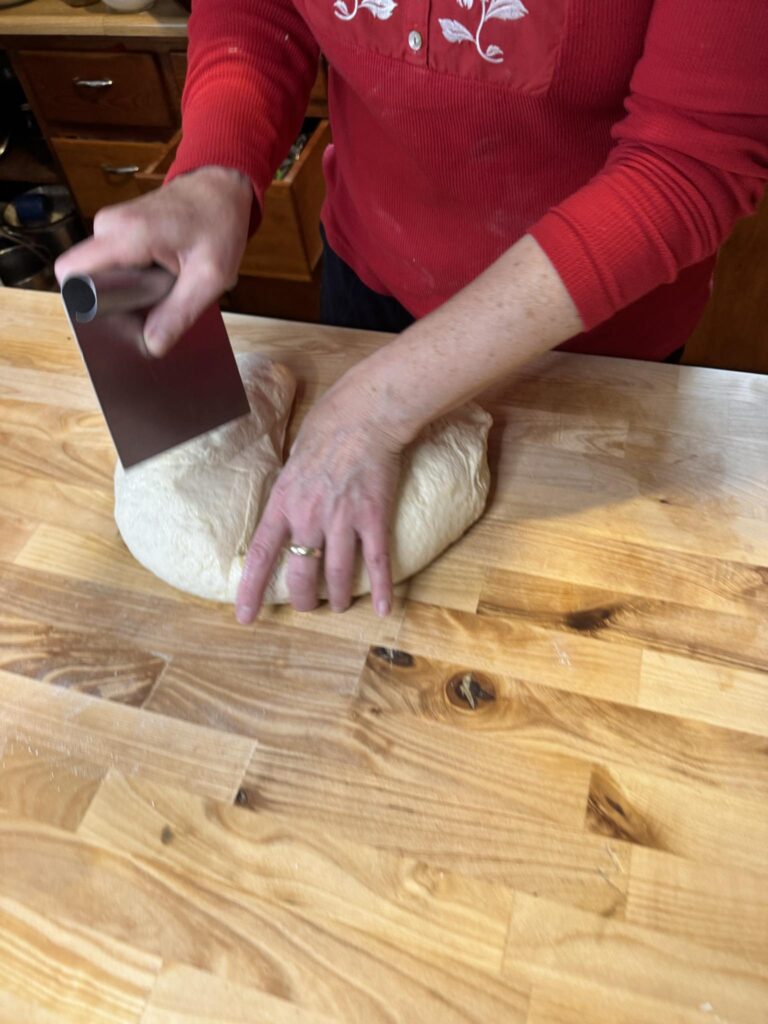
5. Shape the Loaves
- Prepare two bread pans by greasing them with olive oil or baking spray.
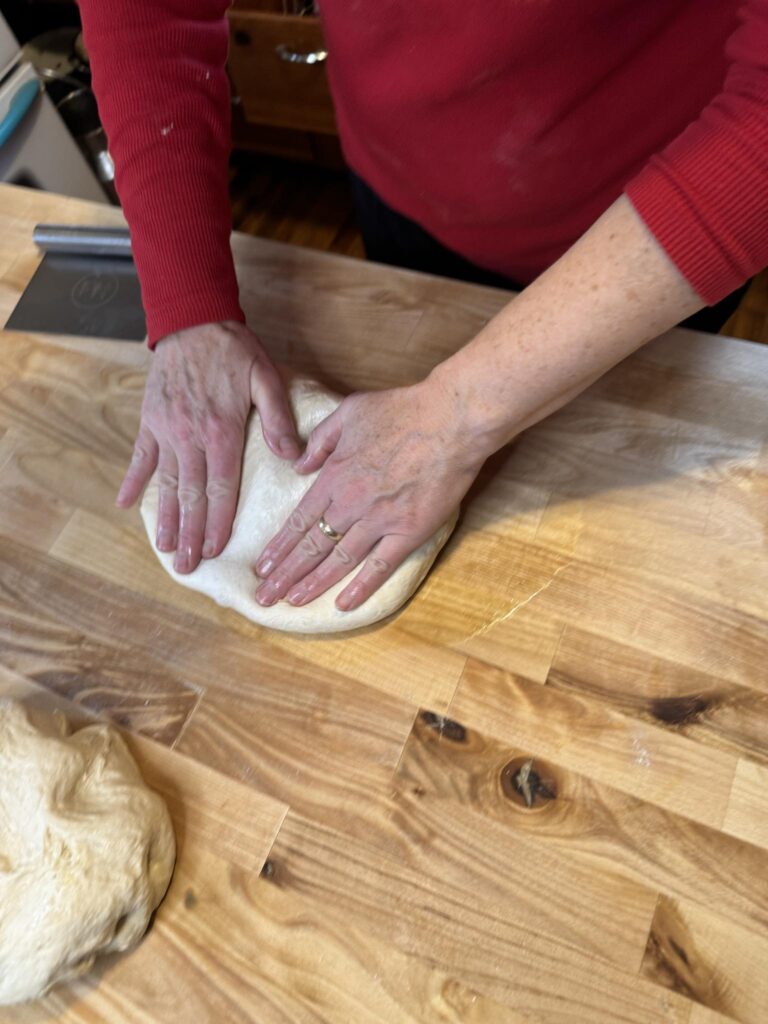
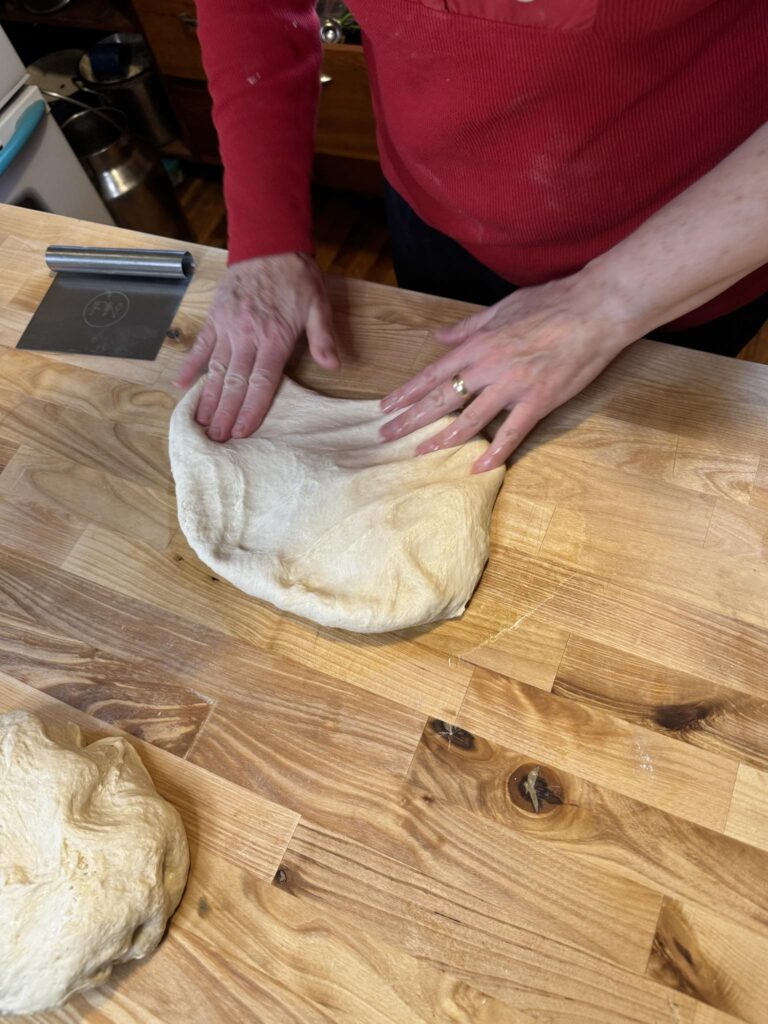
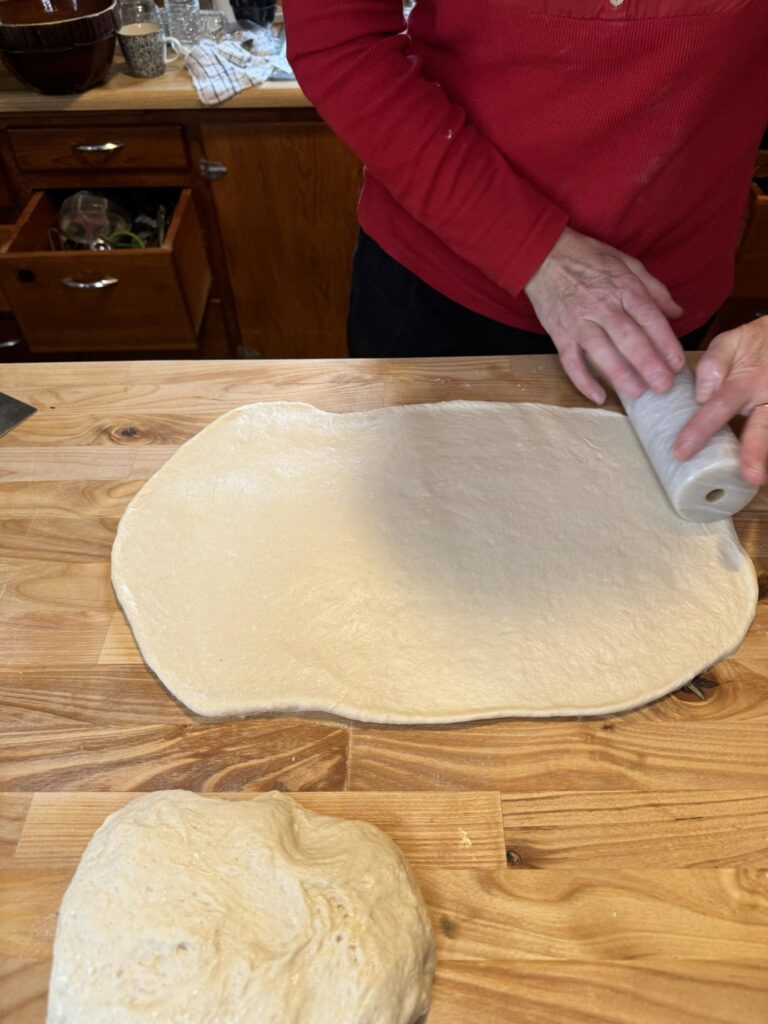
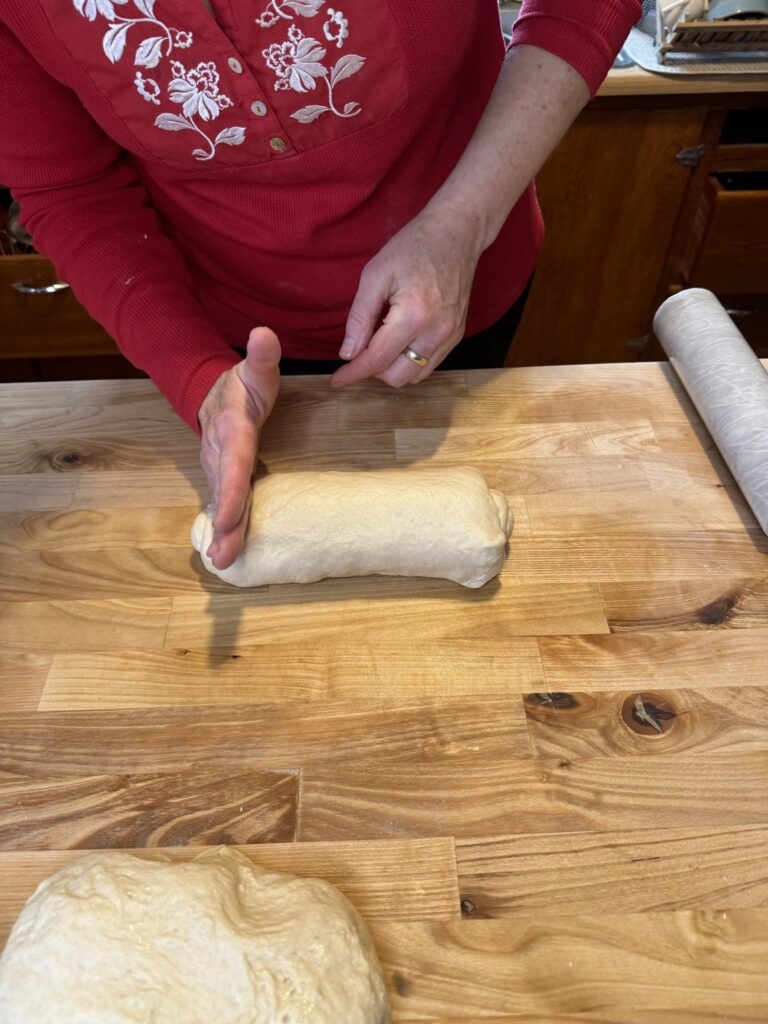
- Turn the risen dough onto a lightly floured surface and divide it in half. Shape each half into a rectangle roughly the size of a 9×13-inch pan.
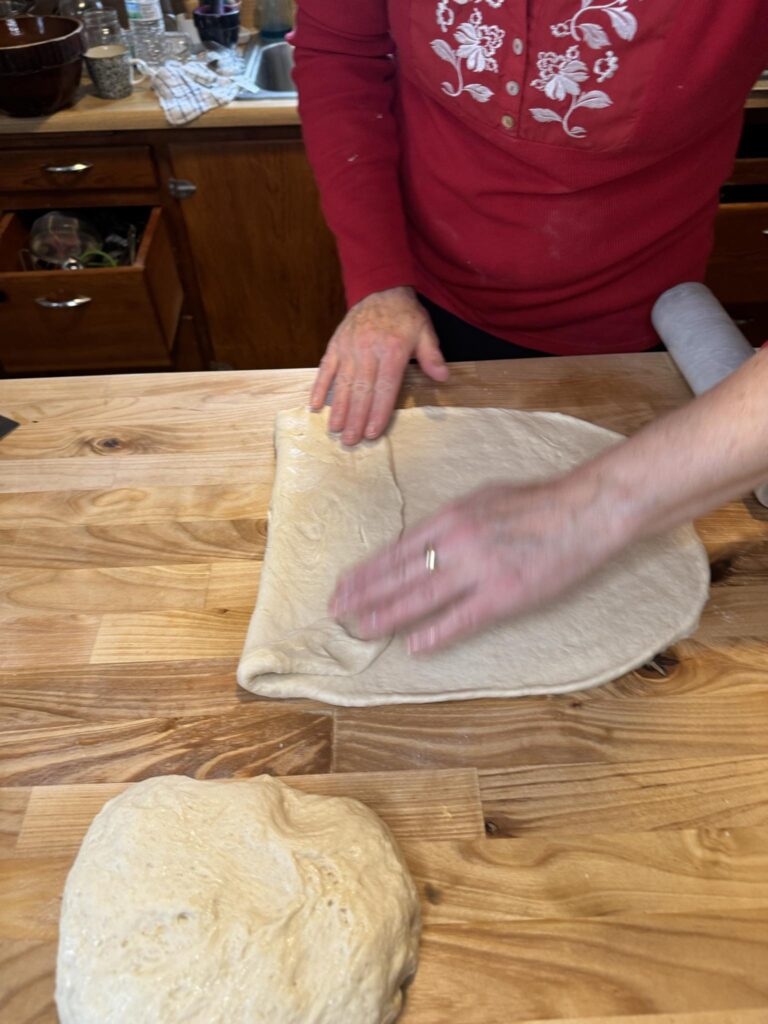
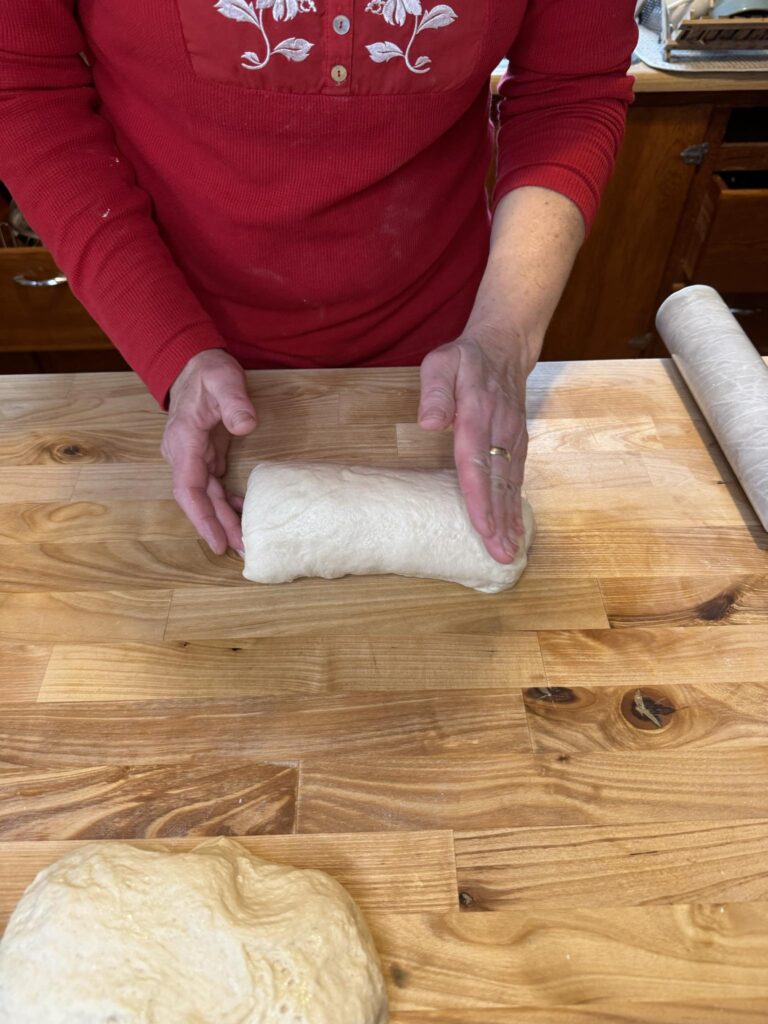
- Fold each rectangle inward from the sides, then roll it tightly from one end to the other. Crimp the seams and tuck the edges under. Place the shaped dough seam-side down in the prepared pans.

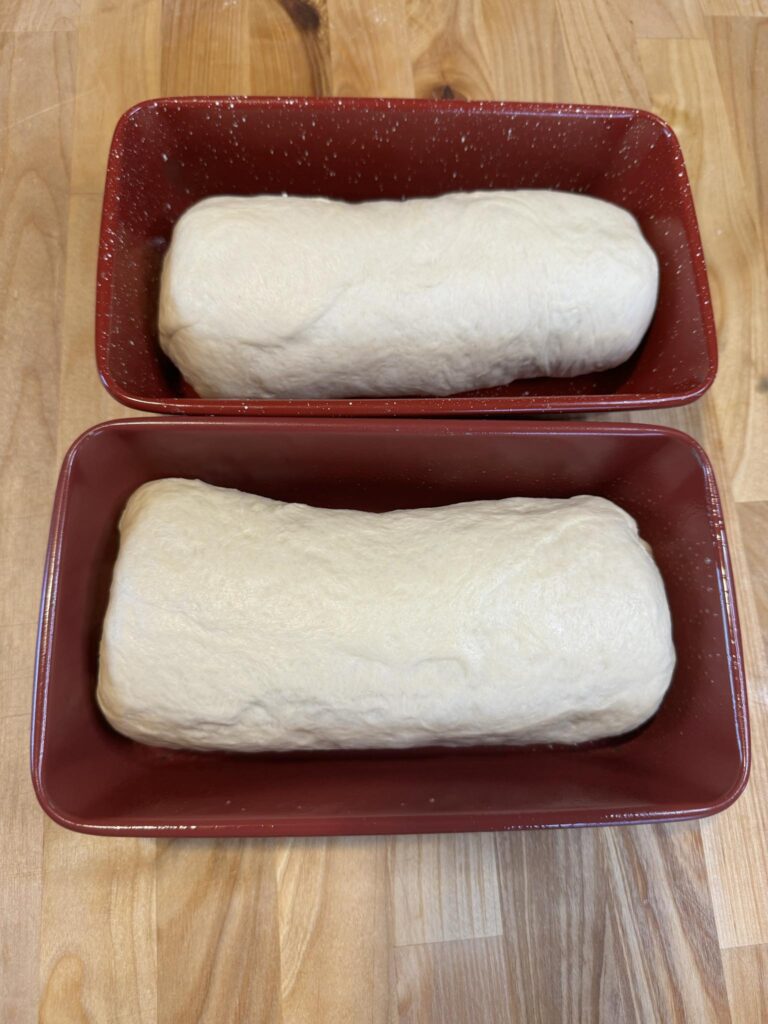
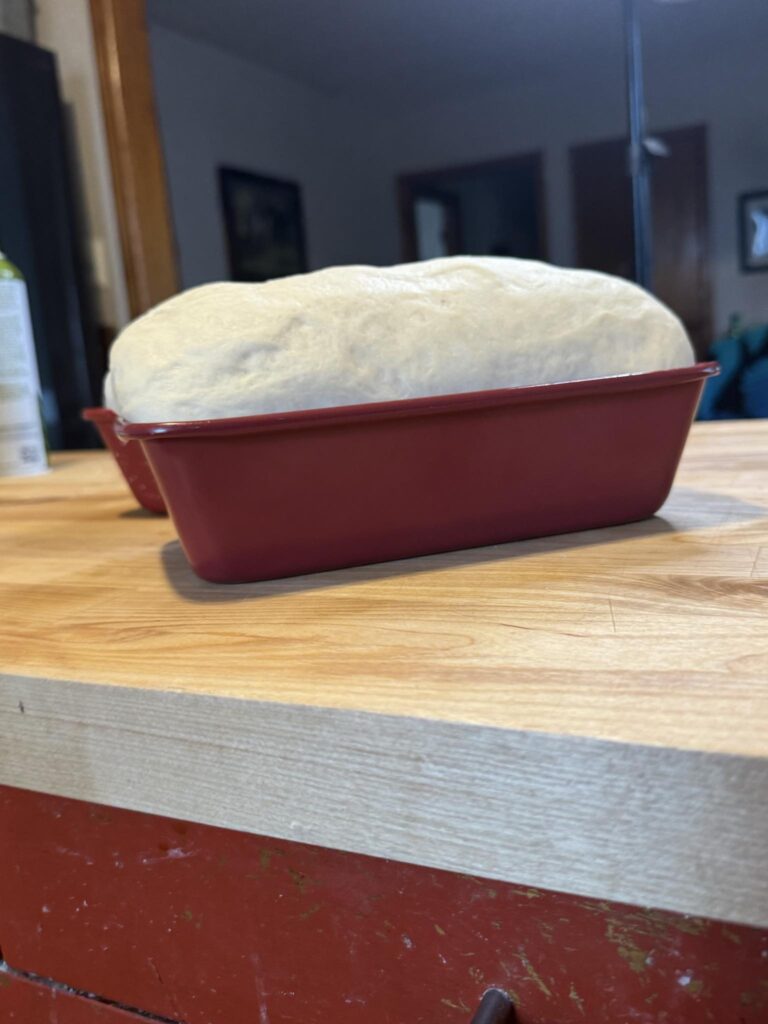
6. Second Rise
- Cover the pans with plastic wrap or beeswax fabric and let the dough rise for 30–45 minutes, or until it has almost doubled in size.
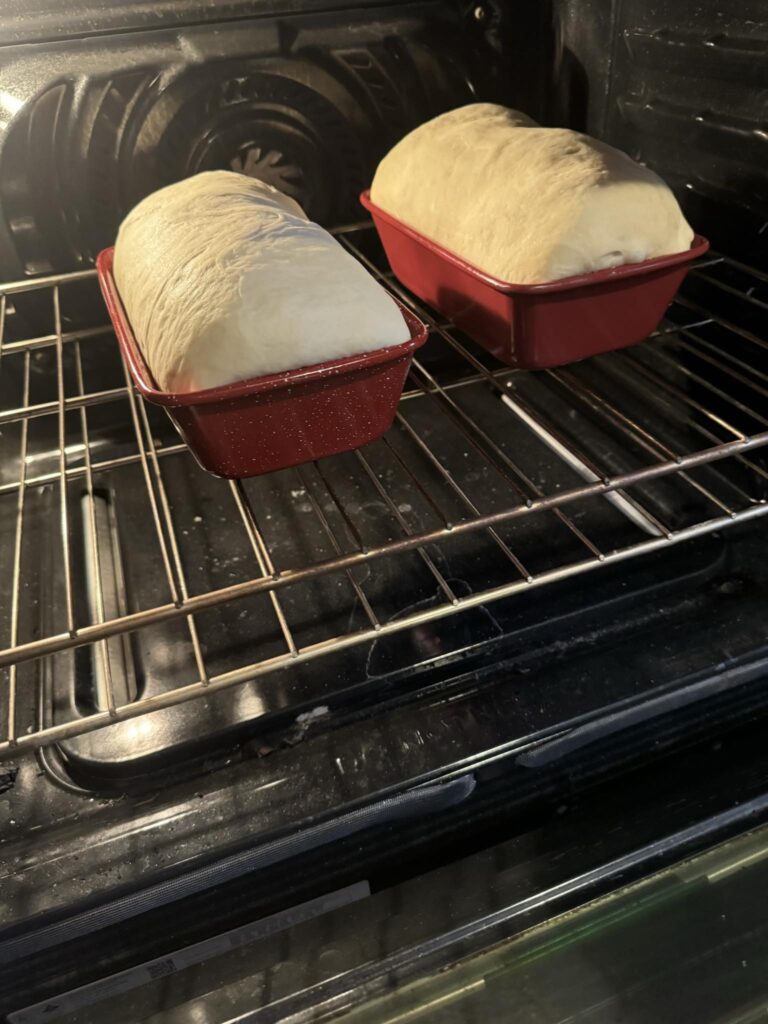
7. Bake the Loaves
- Preheat your oven to 350°F.
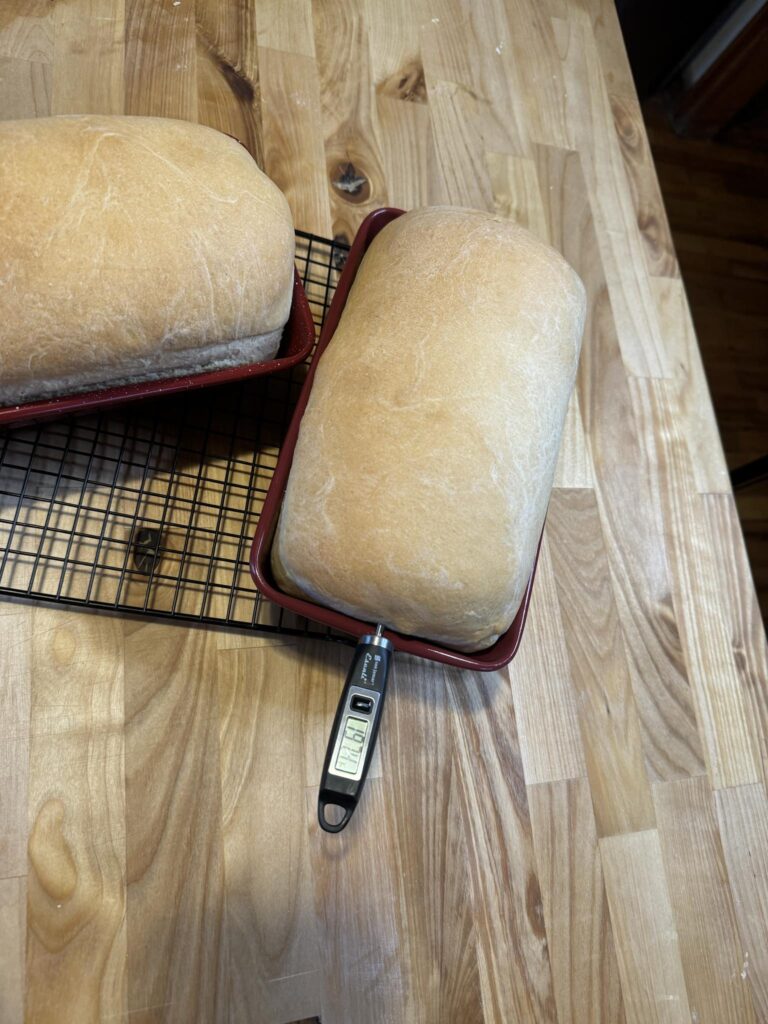
- Bake the loaves for 25–30 minutes, until the tops are golden brown and the internal temperature of the bread reaches 185–190°F.
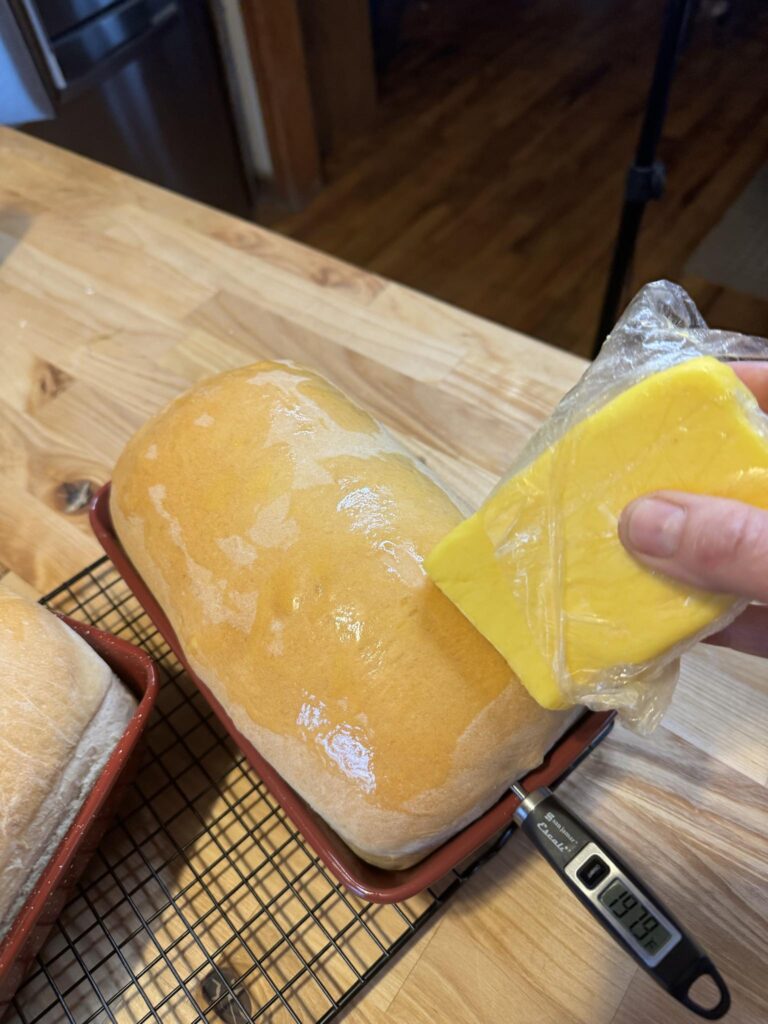
- For a glossy finish, brush the tops of the loaves with melted butter after baking.
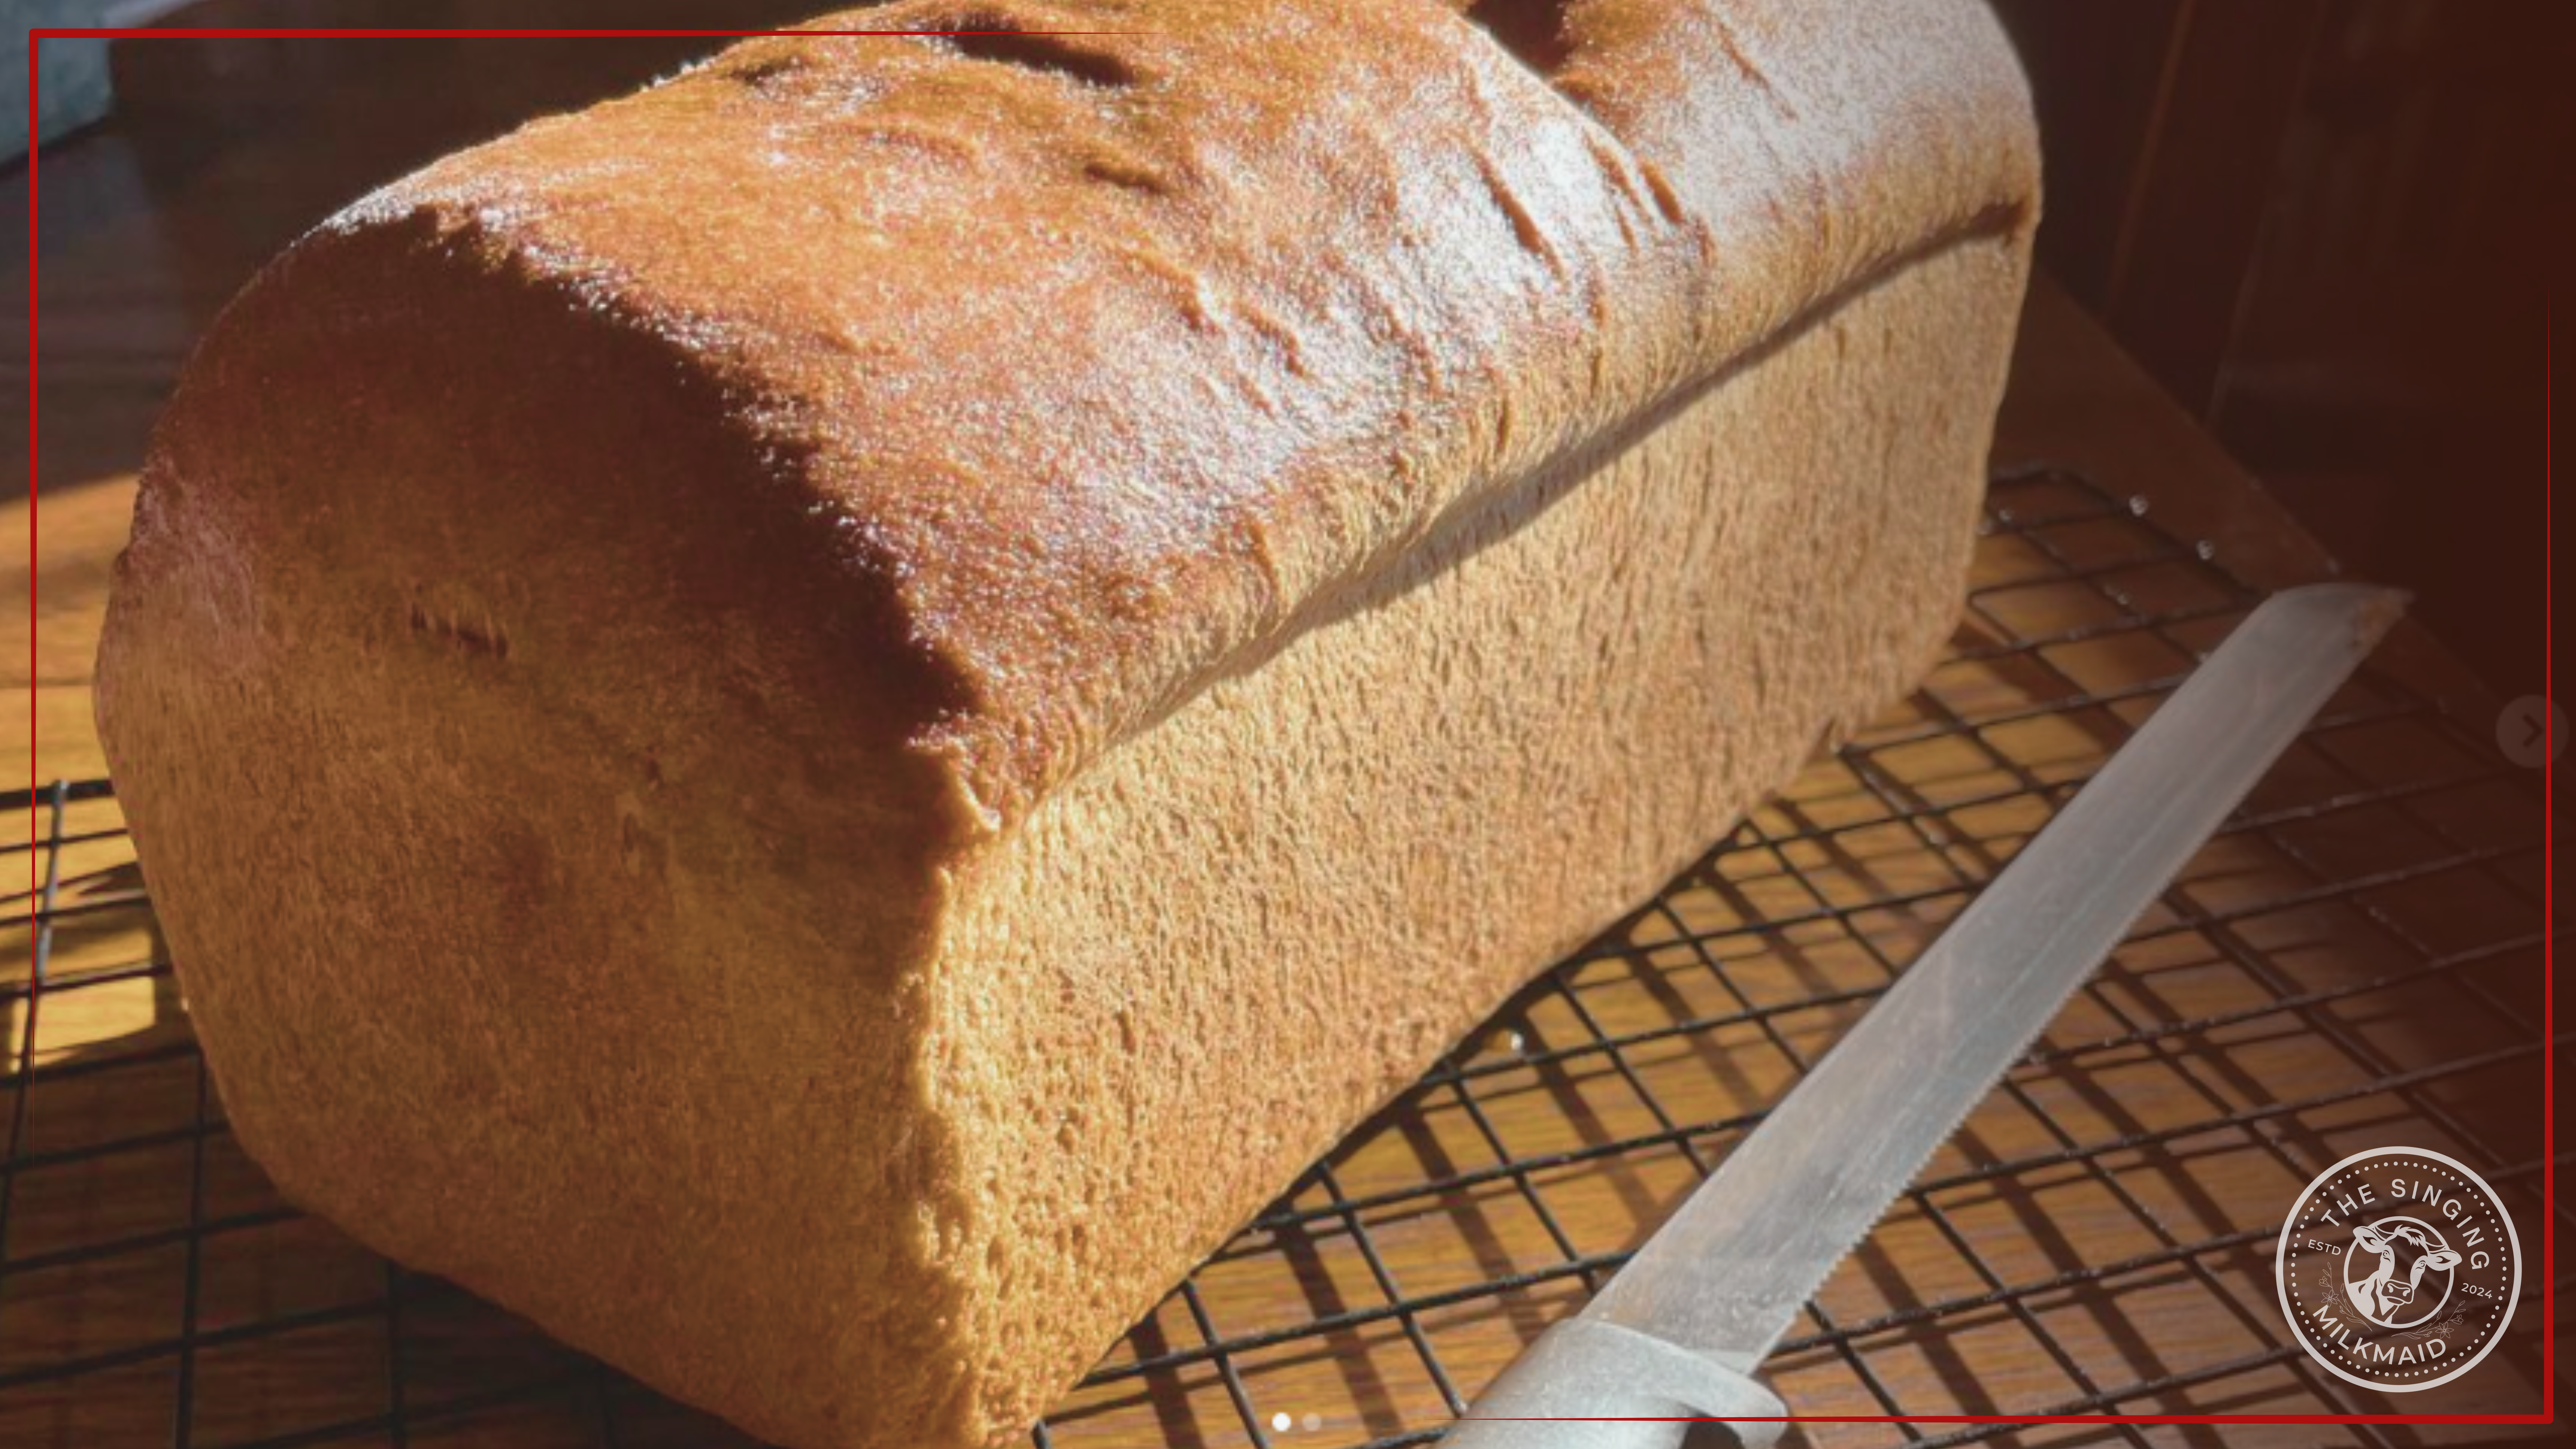
8. Cool and Serve
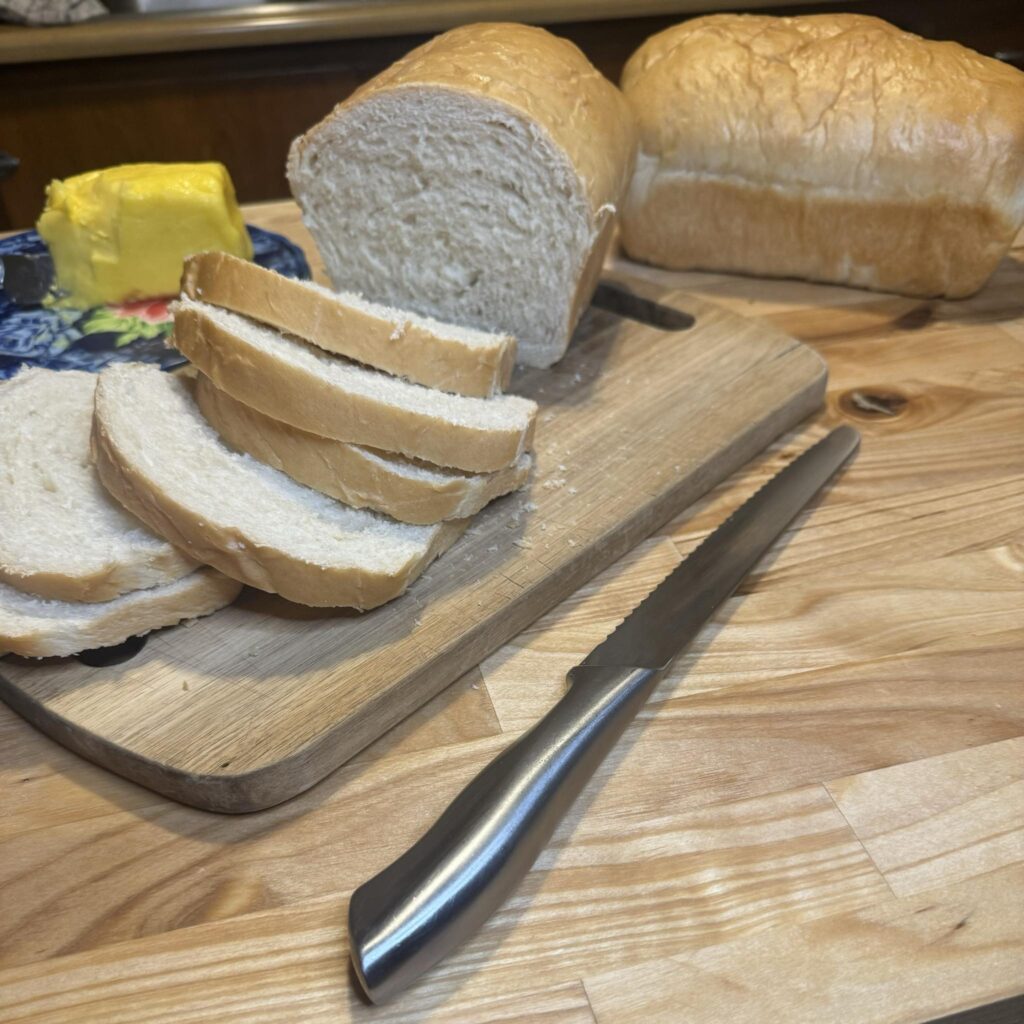
- Let the loaves cool in the pans for about 10 minutes, then transfer them to a wire rack to cool completely before slicing.
Nutrition Information (per slice, approx. 16 slices per loaf)
- Calories: 120
- Carbohydrates: 22g
- Protein: 3g
- Fat: 2g
- Sodium: 220mg
- Sugar: 3g
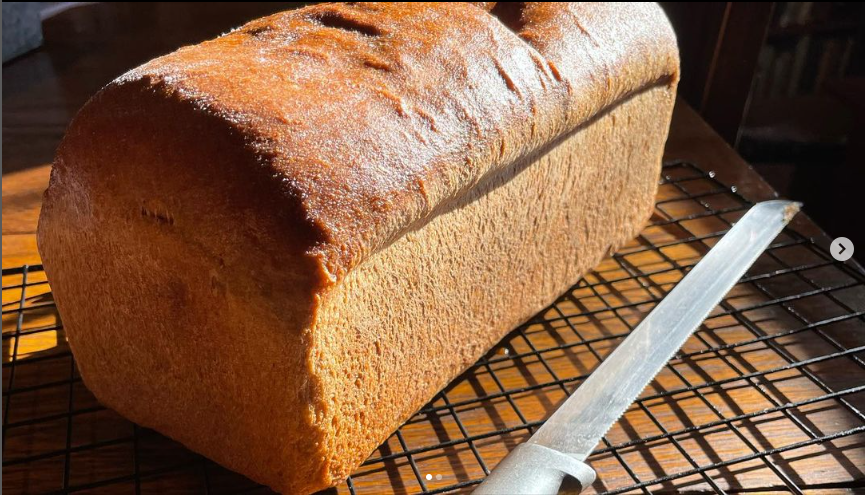
This recipe is perfect for beginner and seasoned bakers alike. The honey adds a subtle sweetness, while the coconut oil keeps the bread soft and tender. Whether you’re making sandwiches for the week or enjoying a slice fresh out of the oven, this bread is sure to be a family favorite.
Happy baking!
Yeast Bread
16
servings120
kcal20
Minutes75-105
Minutes25-30
Minutes2.5
hoursThere’s nothing quite like the smell of freshly baked bread wafting through your kitchen. This yeast bread is soft, slightly sweet, and perfect for sandwiches, toast, or just enjoying a warm slice with butter. With a little time and effort, you’ll have two beautiful loaves of homemade bread to enjoy and share.
Ingredients
2 packages Yeast (4 ½ teaspoons)
½ cup warm water (around 108°F)
1 ¾ cups warm water
3 tablespoons Honey
2 tablespoons Coconut Oil
6-7 cups All-Purpose or Whole Wheat Flour
Directions
- In a large bowl, combine yeast and ½ cup of warm water. Let it sit for 5 minutes until it becomes foamy.
- Add the honey, coconut oil, salt, 1 ¾ cups warm water, and 3 cups of flour to the yeast mixture. Whisk until smooth.
- Gradually add the remaining flour, ½ cup at a time, stirring with a spoon after each addition.
- Once you’ve added about 6 cups of flour, begin kneading the dough on a floured surface. Add small amounts of flour as needed to prevent sticking. Knead for 5–10 minutes, until the dough feels elastic and smooth.
- Lightly coat a large bowl with olive oil and place the dough inside. Cover with a clean towel or plastic wrap and let it rise in a warm spot for 45–60 minutes, or until doubled in size.
- Prepare two bread pans by greasing them with olive oil or baking spray.
- Turn the risen dough onto a lightly floured surface and divide it in half. Shape each half into a rectangle roughly the size of a 9x13-inch pan.
- Fold each rectangle inward from the sides, then roll it tightly from one end to the other. Crimp the seams and tuck the edges under. Place the shaped dough seam-side down in the prepared pans.
- Cover the pans with plastic wrap or beeswax fabric and let the dough rise for 30–45 minutes, or until it has almost doubled in size.
- Preheat your oven to 350°F.
- Bake the loaves for 25–30 minutes, until the tops are golden brown and the internal temperature of the bread reaches 185–190°F.
- For a glossy finish, brush the tops of the loaves with melted butter after baking.
- Let the loaves cool in the pans for about 10 minutes, then transfer them to a wire rack to cool completely before slicing.